How to Create Stunning Birthday Invitations with a Modern Birthday Party Template
Planning a birthday celebration can be both exciting and overwhelming. You want everything to look perfect, from the decorations to the cake, but especially the invitations. In today's digital-first world, a modern birthday party template offers an elegant solution. It saves time, ensures professional quality, and gives you complete creative control. Whether you are organizing a party for a child, a friend, or yourself, these templates make the process smooth and enjoyable.
This article explores everything you need to know about using a birthday flyer template. We will cover its purpose, how it works, and why it has become a go-to tool for event planners, parents, and business owners alike. By the end, you will understand how to customize your own invitation, avoid common pitfalls, and create something truly memorable.
What Is a Modern Birthday Party Template?
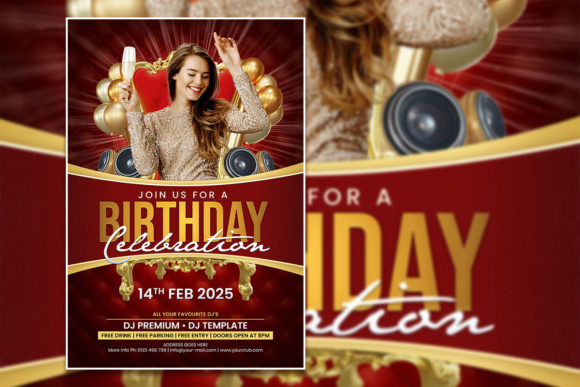
A modern birthday party template is a pre-designed digital file that you can edit to create your own invitation or flyer. Typically created in Adobe Photoshop, these templates come as layered PSD files. They include all the design elements you need: background images, text boxes, color schemes, and decorative graphics. The best part is that everything is organized into separate layers, making it easy to swap out text, change colors, or replace images.
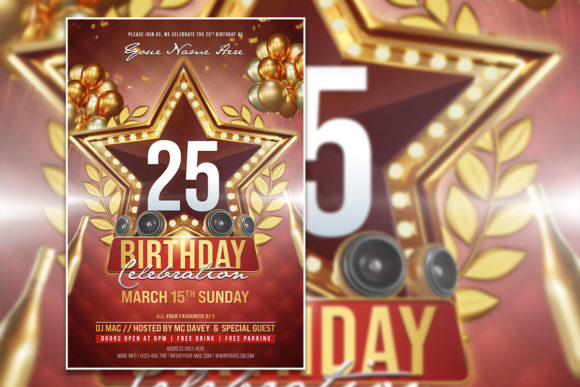
Unlike a generic invitation you buy at a store, a birthday celebration flyer template allows for deep personalization. You are not stuck with someone else's design choices. Instead, you can adjust fonts, insert your own photos, and tweak the layout to match your party theme. This flexibility makes it ideal for both personal events and professional promotional use.
Key Features of a Quality Template
- High resolution: Most templates are set at 300 dpi (dots per inch), ensuring crisp, clear prints. Common dimensions are 2000 x 3000 pixels, perfect for flyers, posters, or digital sharing.
- Organized layers: Each element—background, text, images, shapes—sits on its own layer. You can hide, move, or edit them individually without affecting the rest of the design.
- Color mode RGB: RGB (red, green, blue) is standard for digital screens, making the design look vibrant on phones, tablets, and computers.
- Included fonts: Many templates either include the font files or provide a link to download them for free. This ensures your final design looks exactly like the preview.
- Instant download: After purchase, you receive the files immediately, usually as a ZIP folder containing the PSD, a JPG preview, and a help text file.
Why Use a Birthday Flyer Template?
The purpose of a birthday flyer template goes beyond just convenience. It democratizes design. You do not need to be a graphic artist to produce beautiful invitations. The template does the heavy lifting, but you still get to inject your personality into the final piece.
Here are some practical reasons people choose this approach:
- Time savings: Designing from scratch takes hours. With a template, you can complete a professional flyer in under 30 minutes.
- Cost effectiveness: Hiring a designer or buying custom invitations can be expensive. A one-time template purchase costs a fraction of that.
- Consistency: If you are promoting a business event, you can maintain brand colors and logos while still celebrating a birthday. The template keeps everything cohesive.
- Versatility: The same template can work for a child's first birthday, a 50th anniversary party, or even a corporate celebration. You just change the text and images.
- Ease of use: With clear layer names and a help file, even beginners can navigate the editing process. No advanced Photoshop skills required.
How to Use an Editable Birthday PSD Template
Using a birthday celebration editable PSD template is straightforward. Here is a step-by-step guide that will help you get started, even if you have never opened Photoshop before.
Step 1: Download and Open the Files
After purchase, you will receive a ZIP folder. Unzip it to reveal the PSD file, a JPG preview, and a TXT help file. The JPG lets you see the design before you edit. The TXT file usually contains important information, such as font download links and basic instructions. Open the PSD file in Adobe Photoshop (CS6 or later works best).
Step 2: Understand the Layers Panel
In Photoshop, look for the Layers panel (usually on the right side). Each element of the flyer has its own layer. For example, you might see layers named "Background," "Title Text," "Date," "Photo Placeholder," and "Decorative Elements." You can click the eye icon next to each layer to hide or show it. This helps you see exactly what you are editing.
Step 3: Replace the Text
To change text, select the Text tool (the T icon in the toolbar). Click directly on the text you want to edit. A bounding box will appear around the text. You can then type your own message, such as the birthday person's name, date, time, venue, and RSVP information. If you want to change the font, highlight the text and choose a new font from the dropdown menu at the top. The help file includes a link to download the original font if you want to keep the same style.
Tip: Most templates use free fonts that are easy to install. Download the font, install it on your computer, and then restart Photoshop. The font will appear in your font list.
Step 4: Add Your Own Photo
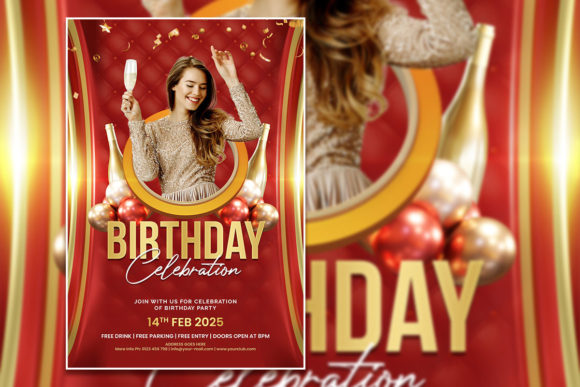
One of the most exciting features of a fully editable birthday flyer template is the ability to replace the stock photo with your own. Look for a layer named "Photo Placeholder" or "Image." It is often marked with a gray box or a sample picture. To replace it:
- Open your photo in Photoshop.
- Use the Move tool to drag your photo into the template document.
- Resize and position it so it fits inside the placeholder area.
- Use a clipping mask (right-click the photo layer and choose "Create Clipping Mask") so the photo stays within the boundaries of the placeholder shape.
This simple step makes the invitation uniquely yours. A photo of the birthday person adds a warm, personal touch that no generic design can match.
Step 5: Adjust Colors and Elements
If you want to change the background color, click on the layer that holds the background shape or gradient. Use the Paint Bucket tool or adjust the Hue/Saturation (Ctrl+U on Windows, Cmd+U on Mac) to shift colors. You can also rearrange decorative elements, resize them, or delete layers you do not need.
Step 6: Save and Export
Once you are happy with your design, save the PSD file to keep your editable version. For printing or sharing online, export as a JPG or PNG. Go to File > Export > Export As, and choose JPG with maximum quality. Your flyer is now ready to print at home, at a local print shop, or to share on social media.
Common Misunderstandings About Editable Templates
Many people assume that using a template means giving up creativity. This is not true. A birthday celebration flyer template is a starting point, not a final product. You have full control over every element. The idea is to give you a professional foundation so you can focus on the fun parts—choosing colors, selecting photos, and writing heartfelt invitations.
Another misunderstanding is that you need expert Photoshop skills. While some experience helps, the templates are designed for beginners. The layers are clearly labeled, and the help file walks you through each step. If you can use the text tool and the move tool, you can edit the template successfully.
Some people worry about resolution and print quality. Reputable templates are created at 300 dpi with dimensions of 2000 x 3000 pixels. This ensures your flyer prints clearly at sizes like 6.67 x 10 inches or larger. Always check the resolution before printing, and avoid stretching images beyond their original size.
Where to Use Your Birthday Flyer
A modern birthday party template is not just for printed invitations. Its versatility means you can use it in many contexts:
- Social media posts: Share your flyer on Facebook, Instagram, or WhatsApp to invite guests digitally.
- Email invitations: Attach the JPG or embed it in an email for a polished look.
- Posters: Print at a larger size to hang at the party venue or community board.
- Business promotions: Use the template for client appreciation events, employee birthdays, or retail promotions.
The design is flexible enough to work for both casual backyard parties and formal dinner celebrations.
How the Template Fits into Modern Life
In our busy world, people value efficiency without sacrificing quality. A birthday flyer template embodies this trend. It allows individuals and small business owners to produce high-quality marketing materials quickly. For parents planning a child's party, it means less stress and more time to focus on the actual celebration. For entrepreneurs, it means maintaining a professional brand presence without overspending on design services.
Moreover, the rise of digital communication has made visual content even more important. A well-designed flyer catches the eye and conveys enthusiasm. Using a template ensures your invitation stands out in a crowded inbox or newsfeed.
Examples of Creative Customization
Let us say you are planning a luau-themed birthday. You can start with a fully editable birthday flyer template that has a tropical background. Replace the sample photo with a picture of the guest of honor wearing a flower lei. Change the text to include party details and a fun message like "Aloha! Join us for a birthday bash." Add a few palm tree or pineapple graphics from your own collection, or use the template's built-in elements. The result is a cohesive, vibrant invitation that sets the tone for the event.
For a more elegant affair, choose a template with minimalist design, clean lines, and muted colors. Swap the photo for a professional portrait, use a script font for the name, and keep the text simple. The same template structure supports completely different aesthetics.
Final Tips for Success
To get the most out of your birthday celebration editable PSD template, keep these suggestions in mind:
- Always read the help file first. It contains font links and specific instructions for that template.
- Work on a copy of the original PSD file. This way, you can always go back to the initial design if needed.
- Use high-quality images. Your own photos should be at least 1500 pixels wide to avoid pixelation.
- Keep the text readable. Avoid placing light text on light backgrounds. Adjust contrast if necessary.
- Test print a small version before printing many copies. This lets you catch any errors or color issues.
Conclusion
A modern birthday party template is more than just a design shortcut. It is a creative tool that empowers anyone to produce stunning, personalized invitations quickly and affordably. With fully editable layers, the ability to replace photos, and professional-grade resolution, these templates bridge the gap between amateur effort and professional polish. Whether you are hosting a birthday bash, promoting a business event, or simply want to make someone feel special, a birthday flyer template gives you the foundation you need. Try one for your next celebration, and see how effortless beautiful design can be.